
Many sewers like to have a few, easy, go-to projects ready in the wings of our minds for those nice little bits of fabric we’ve ended up with, or to whip up when a special occasion calls for a new outfit but we don’t have a lot of time. This pillowcase dress fits the bill for both! It’s one of those projects that you can complete within a few hours and can scratch that ‘instant sewification’ itch. Note: No pillow cases are harmed in the making of this dress, it’s a riff on an old idea but we’re zhuzhing it up by panelling the dress with different fabrics. Unless of course you go hunting for fabrics to upcle and use a cotton pillowcase, as I have! It’s the blue panel!
Below is a cutting guide for 3 months through to 6T. But of course you can adjust this to fit older girls as well, though as a top instead of dress. There are a few seaming options, but if you’d like to French seam remember to add an extra half inch or centimeter to all the edges.
Fat Quarter Pillowcase Dress Sizing/Cutting Chart
| Size | Length | Dress Panels | Bottom Panels |
|---|---|---|---|
| 3m – 6m | 13″ | 3 3/4″ x 12″ | 5 1/2″ x 22″ |
| 6m – 12m | 14″ | 4″ x 13′ | 5 1/2″ x 22″ |
| 12m | 15.5″ | 4 1/2″ x 14″ | 6″ x 22″ |
| 18m | 17.5″ | 4 1/2″ x 16″ | 6″ x 22″ |
| 2T | 19.5″ | 5″ x 18″ | 6″ x 22″ |
| 3T | 21″ | 5 1/2″ x 19 1/2″ | 6″ x 22″ |
| 4T | 22″ | 6″ x 20″ | 7″ x 22″ |
| 5T | 24″ | 6″ x 22″ | 7″ x 22″ |
| 6T | 25.5″ | 6 x” 22″ | 8 1/2″ x 22 |
This project is ideal for those cute fat quarters that you’ve collected but haven’t used yet, but if you’re buying fabric for it you only need 1/4 of a yard or 25cms of each of your five fabrics. You can also use scraps of fabric, or upcycle from other garments! And of course, if your fabrics aren’t quite long enough, you can compensate by making the bottom panel wider. It really is the best little stash-buster dress!
Along with your fabric, you’ll need the usual:
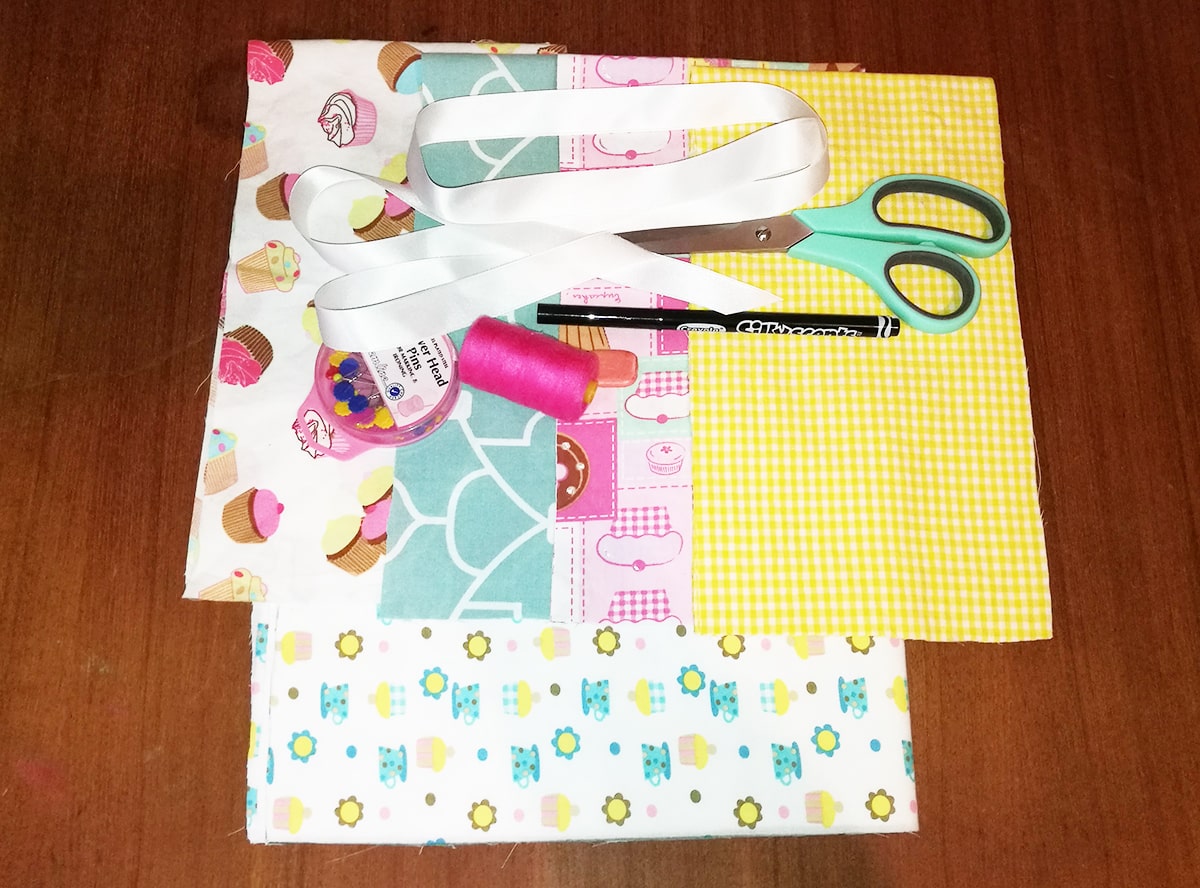
- Thread (matching or contrasting works great with this dress!)
- Scissors
- Tape measure or ruler
- Tailor’s chalk or fabric marker (Crayola markers are entirely washable, and I use one as my fabric marker all the time! Frankly, more reliable than some fabric markers I’ve bought which failed to wash out!)
- Ribbon or double fold bias tape
- Iron
Once you’ve cut your eight panels and two bottom panels, it’s time to sew it together!
I suggest 3/8 inch or 1cm seam allowance for this project, unless French seaming, but if you’re doing that chances are you have a handle on French seams so I’ll leave you to it, fancy pants!
Step 1 – Panels, panels, panels!
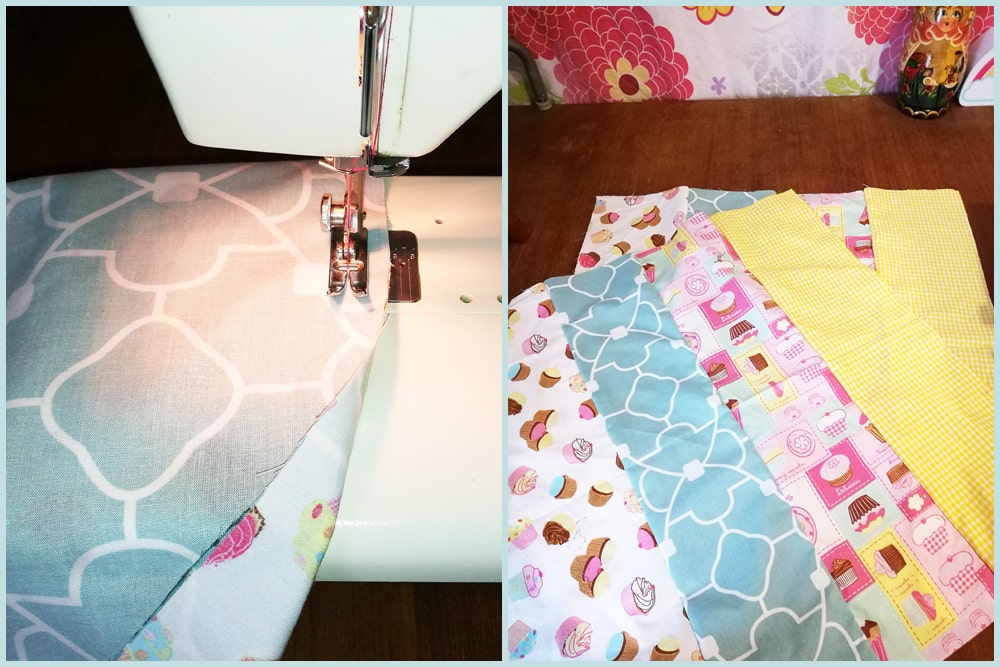
With right sides facing, sew along the long edge of two of your dress panels with straight stitch. Then add two more in the same fashion. Then do the same with the four remaining panels so that you have two large pieces of fabric.
Step 2 – Pretty on the inside, too
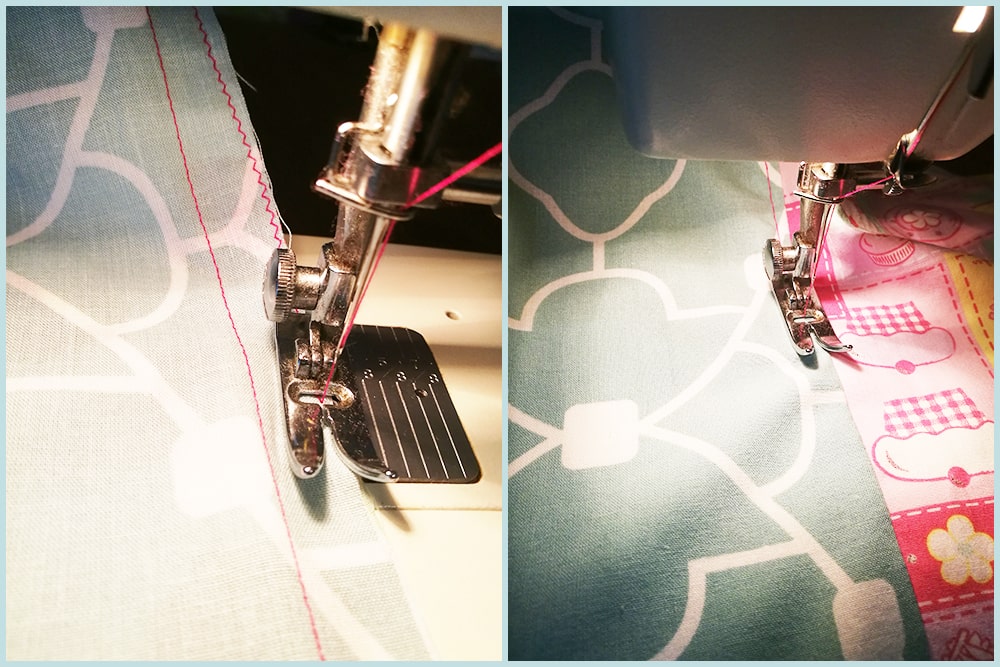
Finish each of your seams by first ironing all in the same direction, then either overlocking/serging along the edges of the fabric, or using your zigzag stitch on your sewing machine, to minimize the chances of fraying. Now with right side up, top-stitch down your seam allowance. Longer stitch lengths look especially nice for top-stitching, and a final iron will set everything nicely.
Step 3 – Last of the panels
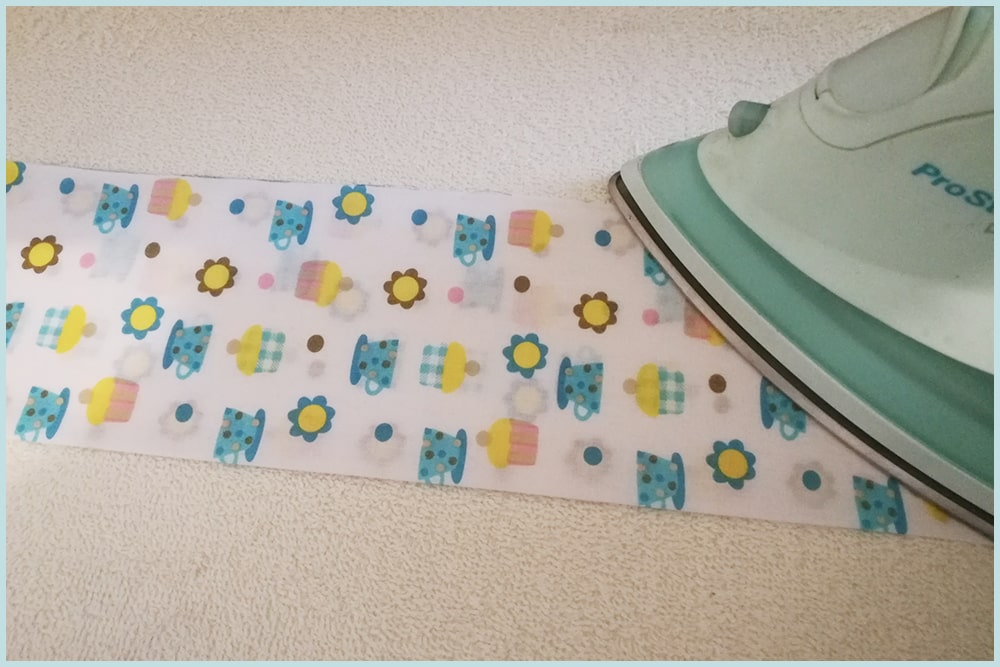
Don’t cool that iron just yet because now we’re going to take the bottom panel fabric and fold it in half length ways, right side out, and iron to set the fold. Cut the bottom panel to match the width of your four already sewn panels. Then do all this again for your other set of sewn panels.
Step 4 – Look Ma, no hems!
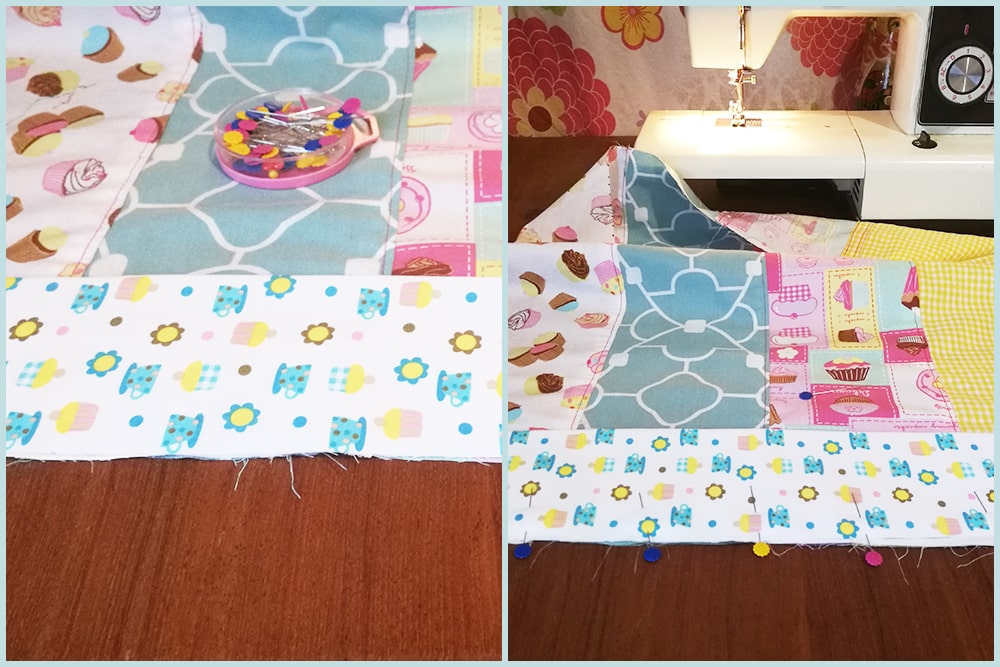
To attach the bottom panel, lay your four sewn panels out with right side up, then at the edge you’d like to be the bottom of your dress, take your folded bottom panel and pin the cut edge to the bottom edge of your four sewn panels.
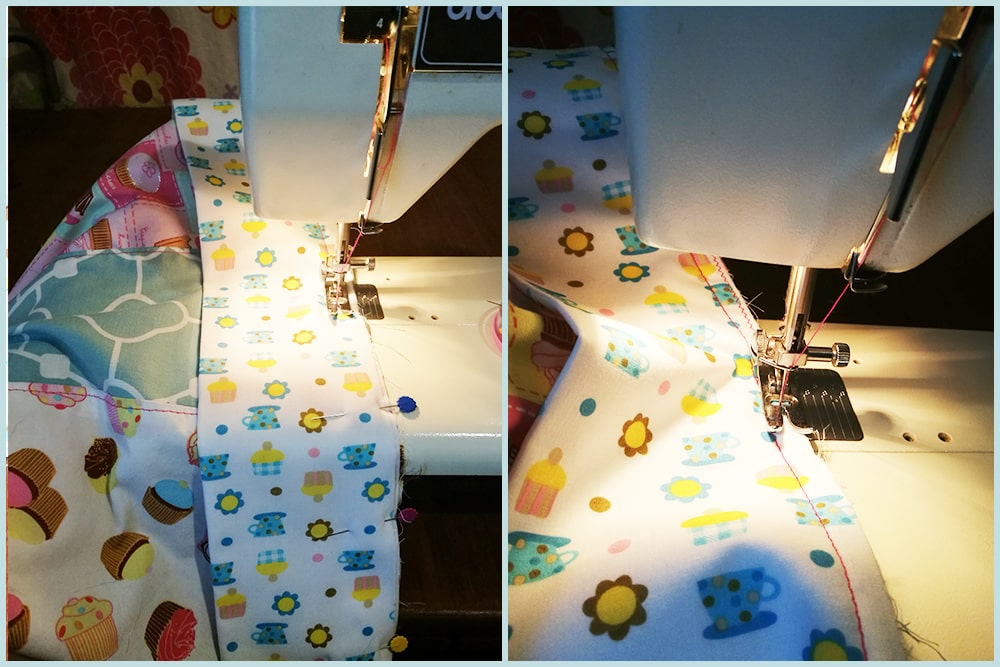
Straight stitch along and then finish those seams (including top stitching!) as we did for the previous ones.
Step 5 – Armholes!
Lay out your two dress panels and mark the following points, starting at the corners;
* 3-12 months – 3 inches or 7.5cm along the top, 3 1/2 inches or 9cm down the side.
*18 month-2T – 3 1/2 inches or 9cm along the top, 4 inches or 10cm down the side.
* 3T-4T – 3 1/2 inches or 9cm along the top, 4 1/2 inches or 11.5cm down the side.
* 4T-6T – 3 1/2 inches or 9cm along the top, 5 inches or 12.5cm down the side.
Now cut a straight line between your marked points, chopping off those corners. Next, fold over the cut corner by 1/4 inch or .5cm and iron. Then fold again a further 1/2 inch or 1cm and iron to set. It’s on the bias so you’ll even be able to curve it slightly if you’d like. Now top-stitch those corners down with 1/4 inch or .5cm seam allowance.
Step 6 – Put it all together
Now pin your two panelled pieces together, lining up those armholes. It’s time to sew some side seams! Start at the folded part of your armholes, which means you’ll have a greater than 1/2 inch or 1cm seam allowance, but taper that to the 1/2 inch or 1cm point as you sew down the side, which gives us a slight A-line to the dress. Trim the wider seam allowance down to match the rest of the 1/2 inch or 1cm seam allowance and then finish those seams with zigzag or serger/overlocker as we have been, but no top-stitching. Give them a good iron, too. You could also add a bit of flair with some trim here, too, as my daughter was all for a little ric rac around the bottom of the dress.
Step 7 – Casements
Nearly there my friends! With wrong side out fold the top of your dress down by 1/4 inch or .5cm and iron. Then fold a further 1/2 inch or 1cm and iron to set. Then sew along the edge of the 1/2 inch or 1cm fold, creating a casing for the shoulder straps. Now if you’re very clever, you can actually sew your casings with your ribbon in there, but you need to go carefully because you need it to act as a draw string, so you can’t stitch your ribbon in place! It’s up to you if you’d like to use this method or the easier, if slower, method of attaching a safety pin to the end of your ribbon or tape and threading it through the sewn casings. Now tie it and make a pretty bow that will sit on one shoulder! If you’re using double folded bias tape, remember to sew it first so it acts like ribbon.
And you’re done! This dress works in any season, too, because it’s equally adorable with tights and a top underneath, as my little one wore it with, or leggings and a little cardigan. If you’ve any queries, please pop them in the comment section and I’ll get to them as soon as I can.
More Sewing Tutorials to Try:
Simple Skirt Tutorial
Upcycled Skirt Tutorial
Harem Pants Tutorial
Wear Your New Dress With Confidence!
I hope this fat quarter pillowcase dress tutorial inspires you to get creative with your fabric stash and craft something special for your little one. It’s such a fun and fulfilling project, quick enough for naptime sewing but adorable enough to wear all summer long. Whether you’re a beginner or an experienced sewist, there’s something so rewarding about making a handmade piece she’ll love to twirl in.
Happy sewing!
2 comments
Hi,
I want to make this with some jelly rolls, but how wide would you make each put together panel? Is it the 5 inches times 4 strips for 2T? So like 20 inches? Or what would you say the finished back panel width so I can figure out how many pieces I want to use and what seam allowance?
I made this pillowcase dress pattern several years ago. Now I have twin nieces and am making them again. I remember a different version on the pattern that used elastic at the neckline (as an option) with the ribbons as only the ties not in the entire neck casing. Do you still have those directions? And can you send them my way? 🙂